In versions of WebSphere Application Server prior to 3.0, all applications and servlets shared a single servlet context. All servlets were served from the Application Server's /servlet directory and the HTML, JSP, and related files were served from the Web server's document root directory.
This model of a single servlet context still works on WebSphere Application Server Version 3 through use of the default_app. The default_app is part of a Application Server's pre-configured default virtual host (named default_host). It is designed to facilitate migration of servlets and applications from an Application Server installation prior to Version 3.0.
WebSphere Application Server Version 3 also supports a new
Web application programming model that allows you to define a Web
application as a group of servlets that share the same servlet context. Using
this model, you can serve the servlets, HTML, JSP and all related files from
one directory on the Application Server. You can find out more about the Web
application programming model in the Application Server Version 3 Documentation
Center. (Go to the Resources tab, select Programming in the left frame, and
then select Servlet basics ![]() Web application programming model in the right frame.)
Web application programming model in the right frame.)
With Studio, you can publish your projects to:
This document describes how to create a Studio project and publish it to WebSphere Application Server Version 3 using the new Web application model. Along with the steps you need to follow, we provide pictures that show how we created, configured, and published a small Web application called demoapp.
Note: Click the small picture to open it at its full size, so you can see the details.
Step One: Create a Studio project with the correct properties
Step Two: Create the associated Web application on the Application Server
Step Three: Restart your Web application
Step Four: Create the directory structure on the Application Server machine
Step Five: Step Five: Create publishing stages in Studio
Step Six: Define publishing targets
Step Seven: Publish your project as usual
Note: Although, there is no technical requirement that a Studio project represent one and only one Web application or that a Web application be contained in a single project, we strongly recommend that you have a separate Studio project for each Web application.
To publish and successfully run your Studio project files on the Version 3 of WebSphere Application Server, your project must be identified as a 3.0 project.
To set the project properties:
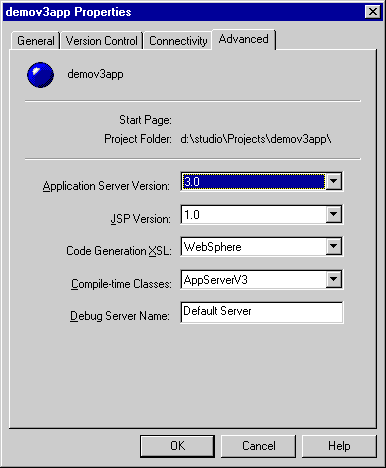
WebSphere Application Server Version 3 provides a wizard for this task as part of the Administration Console. The wizard walks you through all the required steps to configure a Web application. To use the wizard, the Application Server must be installed and running.
In this example, we open the Administrative Console locally (on the host machine where the Application Server is installed). If you installed the Administor's Console client on another machine, you can use that client to remotely access the Application Server's configuration.
1. Start the wizard:
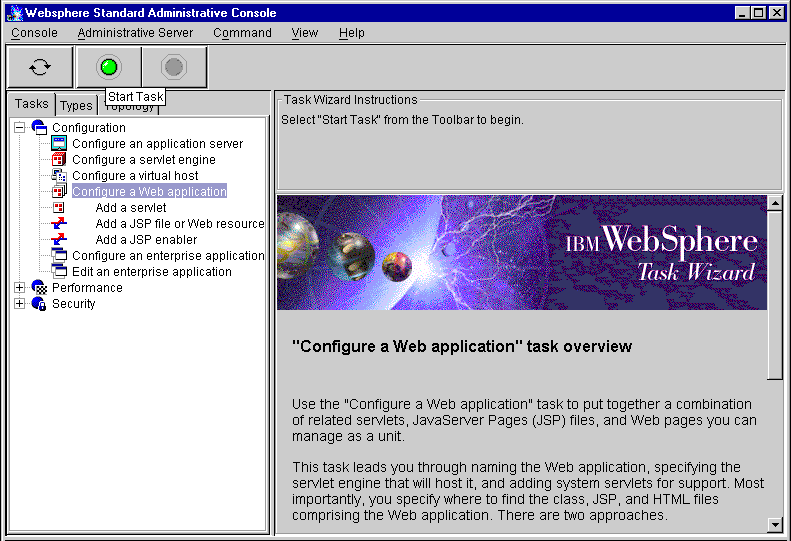
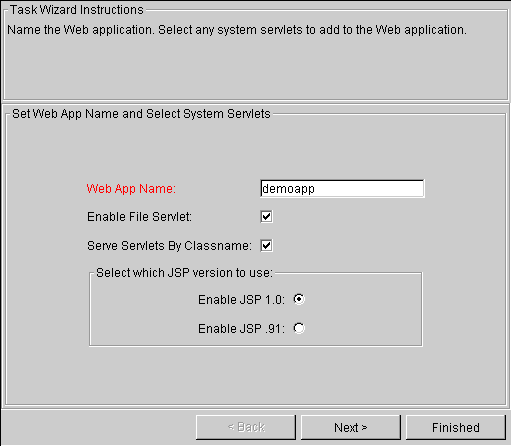
2. Name your Web application:
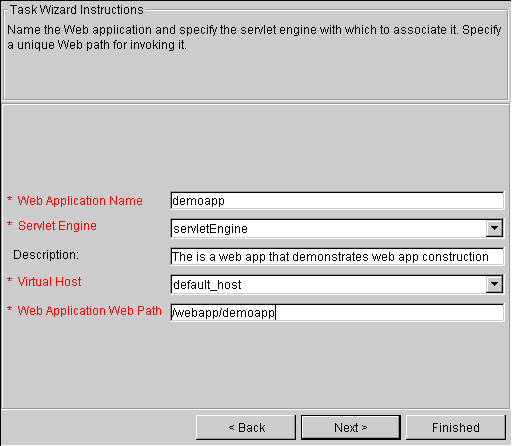
3. Specify the servlet engine and Web path for your application:
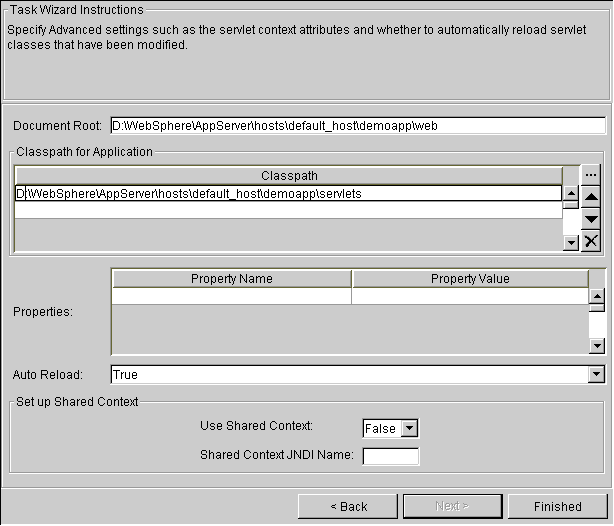
4. Specify the advanced settings:
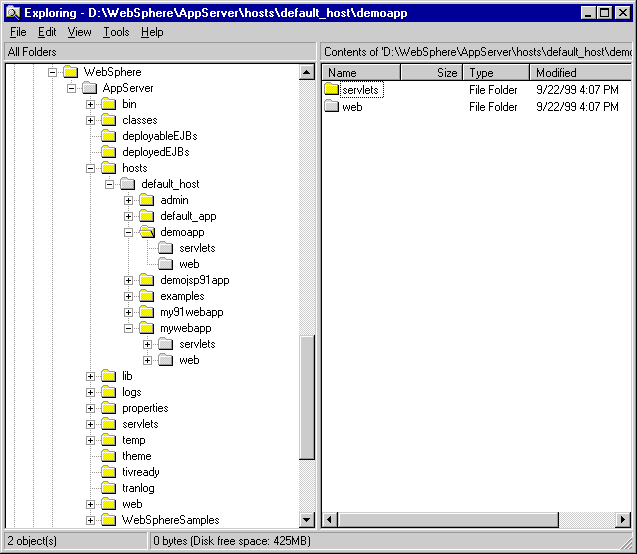
Add folders (or directories) to your Application Server machine to match the directory structure of your Web application.
On your Application Server machine, starting in the directory where you installed the Application Server:
Refer to the Studio Guide for information about creating publishing stages.
In each of the project's publishing stages:
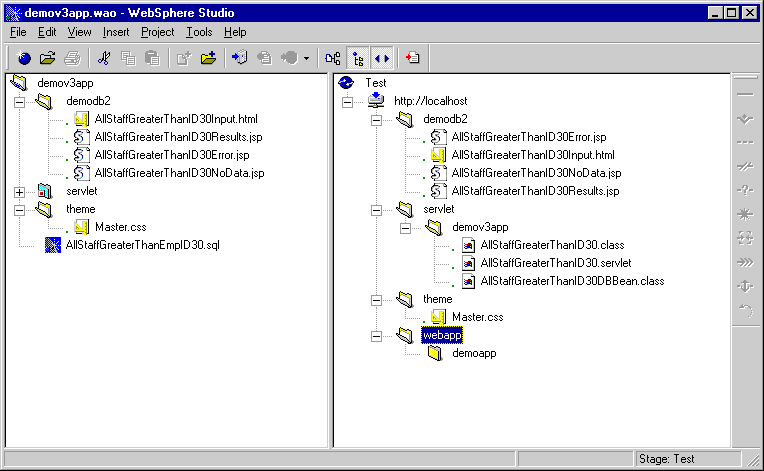
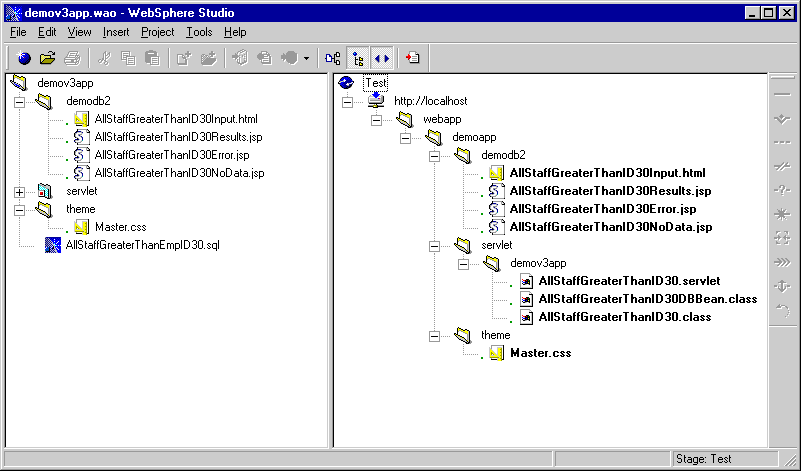
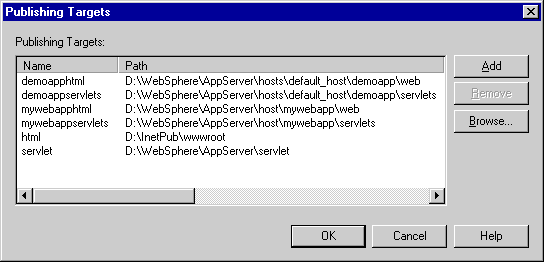
Define new publishing targets that represent the directories in your Web application's classpath and document root directories. We recommend creating new publishing targets for each application. This will minimize confusion when you have different Web applications in different projects that run on the same server.
1. In the Publishing View, define publishing targets for the Version 3 Application Server:
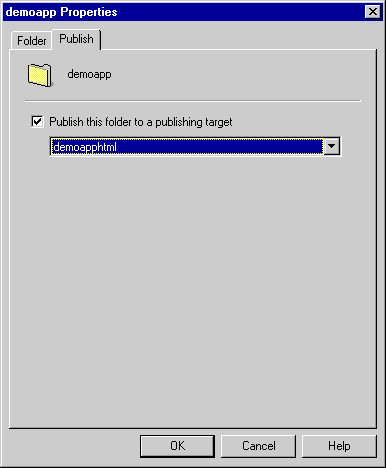
2. Change the properties for the Web application folder so it becomes a publishing target and point it to the Web document root publishing target for the application:
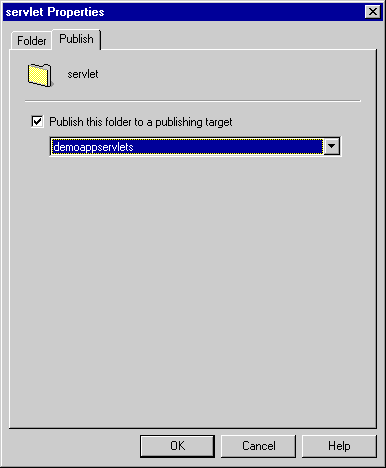
3. Change the publishing target for the servlet folder in the publishing stage to use the publishing target that represents the Web application's classpath:
When you publish your project, the files will be copied to the WebSphere Application Server and put into the correct directories.
After publishing, check the Application Server directories to verify this.
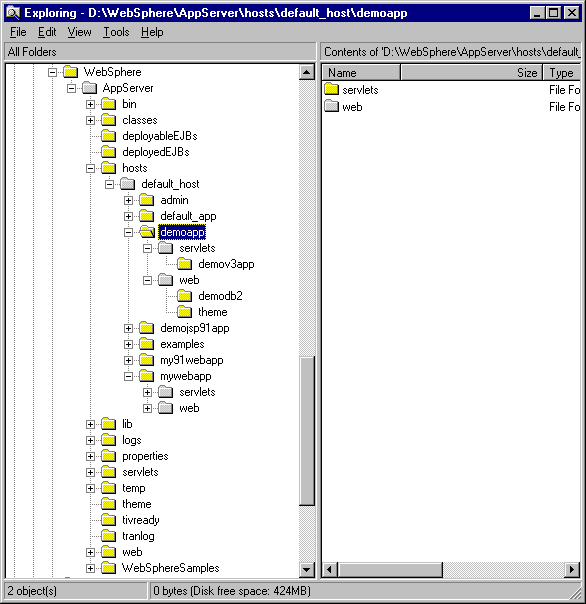
After publishing, if you open a .servlet file on the Application Server, you
will notice that the URIs contain the Web application's Web path. Our .servlet
file looked like this:
 <?xml version="1.0"?>

  <!-- This file was generated by IBM WebSphere Studio 3.0.0 -->

  <servlet>

  <page-list>

  <default-page> <uri>/webapp/demoapp/demodb2/AllStaffGreaterThanID30Results.jsp</uri>
  </default-page>

  <error-page> <uri>/webapp/demoapp/demodb2/AllStaffGreaterThanID30Error.jsp</uri>
  </error-page>

  <page> <uri>/webapp/demoapp/demodb2/AllStaffGreaterThanID30NoData.jsp</uri>


  <page-name>com.ibm.webtools.runtime.NoDataException</page-name>

  </page>

  </page-list>

  <code>demov3app.AllStaffGreaterThanID30</code>

  <init-parameter value="COM.ibm.db2.jdbc.app.DB2Driver" name="driver"/>


  <init-parameter value="sesame01" name="password"/>

  <init-parameter value="jdbc:db2:sample" name="URL"/>

  <init-parameter value="samiam" name="userID"/>

  <init-parameter value="jdbc/ibmwebspherestudio/AllStaffGreaterThanID30" name="dataSourceName"/>

  </servlet>
If you look at an HTML file that contains a form, you will also notice that
the ACTION attribute of your HTML FORM tags have been properly resolved to include
the Web application's Web path. Here is the FORM tag in our HTML file after
we published:
<FORM METHOD="post" ACTION="/webapp/demoapp/servlet/demov3app.AllStaffGreaterThanID30">
Because the Web application's Web path is in the .servlet files and not in your source code, you can easily change the application to which your project is published. If necessary, you can even publish the project to different Web applications using different Studio stages.
Use your browser to go to the URL for your application and verify that it is being served correctly.