 Studio
Basics
Studio
BasicsCarol Jones
Senior Technical Staff Member
IBM
May 1999
Introduction
WebSphere Studio is a suite of tools designed to help everyone on your web development team work togther. Studio has features that help page designers, graphic artists, programmers, and webmasters work together, so the right expert can do each job. With the WebSphere Studio, you can create, assemble, publish, and maintain dynamic interactive web applications, powered by IBM's WebSphere Application Server.
The remainder of this paper has the following sections:
- Studio Features
First, we'll go over the main features of Studio. - Getting Acquainted
Then, we'll tell you about the main windows in Studio and what they are used for. - Working with Files
Next, we show you how to register your favorite editing tools and how to use the ones that Studio provides. - Publishing and Previewing the Site
We wrap up by telling you about previewing your site and publishing it to your web server.
With the integration of Wallop's Built-IT technology (which IBM acquired in the fall of 1998) and the enhancement of its base functions, WebSphere Studio now offers all the features you need to create and manage your web applications. Its key features include:
- Graphical display of the links between files in a project
- Automatic update of links whenever files change or move
- Registration of your favorite tools for editing the project's files
- A built-in Page Designer for creating and editing HTML and JSP files
- Wizards that give you a jump-start on creating dynamic pages using databases and JavaBeans
- Staging and publishing to different (and to multiple) servers
- Integration with popular source control management software like IBM VisualAge Team Connection, Microsoft Source Safe, PVCS, Rational ClearCase, and Lotus Domino.
- Companion tools that round out your web development toolkit:
- Applet Designer, a visual authoring tool that makes it easy to build new Java applets
- WebArt Designer, a handy tool for creating masthead images, buttons, and other graphics for your page
- AnimatedGif Designer, for assembling GIF animations.
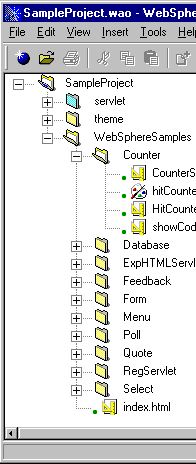
Studio's main window has a File View on the left side, which represents the directory structure of your source files. You can organize the file and folders any way you like. The picture below shows a Studio sample project opened in the File View.

When you open Studio for the first time, the program asks if you want to create a new project. Then you are presented with the new project dialog, and asked to provide more information about your first site. This information includes the name of the project, its location on your hard drive or shared file system, and what type of site that you want to create. You can choose a blank site, or choose from one of the "ready built" sites as a starting point.
If you already have a web project on your server or file system, you can just choose a blank project, and then add the files you want later on. How do you add files to the project? There are several ways:
-
One way is to use Studio's import wizard to import an entire site.
You can access the site using either HTTP or FTP, and there are options for controlling how far
to follow links, which domains to access, and what to do when you encounter password protected pages.
-
Another way is to use Studio's archive format.
You can archive a whole site in one easy step, creating a single compressed file, much like a zip file.
-
Of course, you can drag and drop files from the Windows Explorer into your project.
-
Or, you can use the Insert dialogs for files and folders.
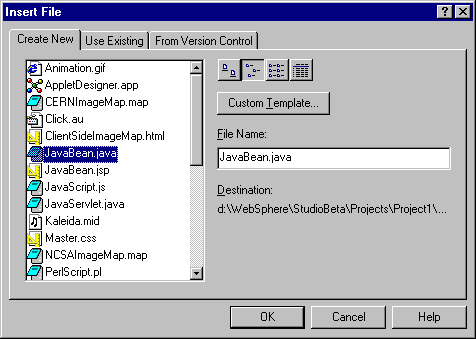
When you open the Insert File dialog, it looks like the picture below.
It contains templates of the most common file types found on web sites, and you can start your
own files from these templates.
Any files that you add to the templates folder will also show up in the list, so you can add
standard page layouts or other kinds of files that your team needs.

Once you've gotten started, use Studio's relations view to get an idea of the structure of the site, and to see which files link to which. If any of the links in your site are broken, they will show up in this diagram as a broken line, so you can find them and fix them directly. Studio also helps you avoid broken links in the first place; whenever you rename or move a file, the links get fixed up for you automatically.

You can move around the diagram by clicking on the plus boxes to adjust the view. The diagram shows 10 kinds of links, including inside and outside links, unverified links, anchor links, and others. It also shows source links, which indicate that one file was derived from another one (such as a GIF file that was exported from a Photoshop PSD file), as well as custom links that you define yourself.
To work with the files in your project, you can use the editing tools that come with Studio, or you can register any favorite tools that you already have. For example, you might have a favorite image editing tool that you want to register as the default editor for JPG files. To register tools, or to see what's already been registered, use the Tool Registration option under the Tools menu.
For editing your HTML and JSP pages, Studio includes the WebSphere PageDesigner. Page Designer has design, source, and preview tabs so you can work in either a visual mode or you can edit the tags directly. Page Designer is a full-function HTML editor, supporting all the standard HTML tags, plus Java Server Pages (JSP) syntax, JavaScript, and DHTML. There's even a built-in editor for cascading style sheets.
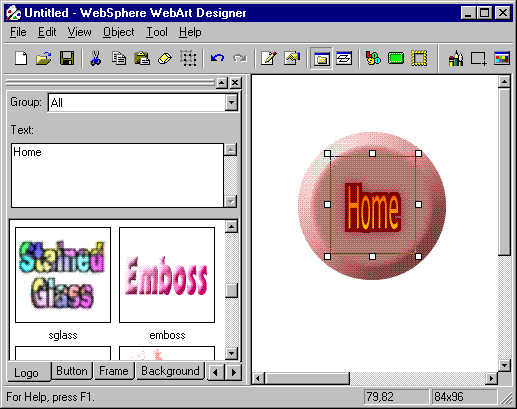
A quick and easy way to add artwork to your page is by using the WebArt Designer. WebArt Designer lets you combine text, background textures, and special effects to make new GIF or JPEG files.

When you work with Page Designer, WebArt Designer, or Applet Designer, these tools are fully integrated with the Studio environment. For example, when you save your HTML page and go back to Studio, any images or other imbedded files are added into the Studio project automatically.
Publishing and Previewing the Site
Now let's see how to publish to your web server, and how to preview your work. Studio includes a copy of the IBM HTTP server and the WebSphere Application Server. If you have these installed and running on your local machine, Studio's installation will detect them and set up default publishing locations automatically.
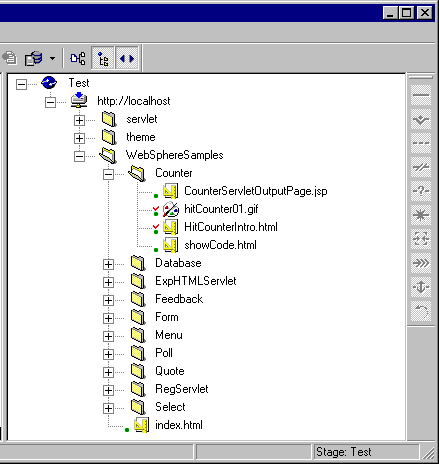
If you want to verify the publish settings, or change the locations where files will be published to, you can switch to the Publish View, which shows all the servers, files, and folder locations for your publishing stages.

As you can see, the Publishing view looks very much like the File view, except that it shows which servers you are publishing to, and the structure that will be copied to your server's file system. Normally, this matches the structure in your File view, but it doesn't have to match at all. You can move the files around any way to suite your needs. For example, you can define more than one server, and split the files across them.
The term "stage" means the definition of the servers and directories that you want to publish to. Usually, you work in the Test stage, but you can additional stages for your own testing, combining your work with your team's work, and finally deploying the site to your production servers.
When you're ready to publish, just press the toolbar button, and the files will be copied to the correct directories on your HTTP server and your Application Server. During publish, you can make choices for how to fix up the links, various kinds of prompts and warnings. Once all the files are copied to the server, you can preview the site from any page, such as the home page. If you are previewing and testing a lot, you can turn on the autopublish setting, and your files will be published automatically as you make changes. This way, you can just press the preview button, and you never have to stop and publish the site.