
Before introducing the steps of executing a plug-in, let's
look at what the plug-in can do. The first VP-UML plug-in - GenerateC++Plugin -
can generate C++ code according to the class model.
 The GenerateC++Plugin jar file and a tutorial of
how to create plug-ins can be downloaded at www.visual-paradigm.com.
The GenerateC++Plugin jar file and a tutorial of
how to create plug-ins can be downloaded at www.visual-paradigm.com.
1.
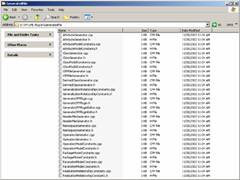
When the GenerateC++ plug-in is executed, the C++ files are generated to
the specified location.
2.
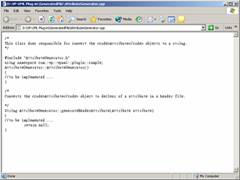
Double click one of the files to see the content.
1.
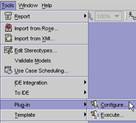
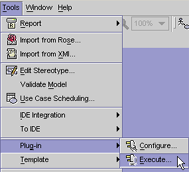
Click on Tools -> Plug-in -> Configure from the menu bar.
2.
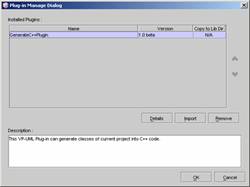
The Plug-in Manage Dialog appears.

3.
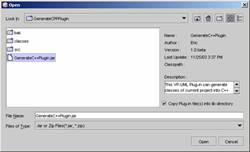
Click on the Import button. The file selection dialog appears, select
the plug-in jar file or class directory. After the file is selected, the information
about the plug-in will be display on the right side of the dialog. Click the Open
button to import the selected plug-in.
4.
The imported plug-in will be listed on the Plug-in Manage Dialog. Select
the plug-in from the table. The description of the plug-in will be displayed in
the description area. To remove the plug-in, select the plug-in and click the
Remove button.
5.
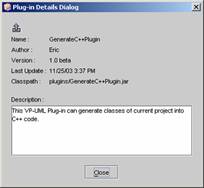
To view the details of the plug-in, click the Details button. The
Plug-in details dialog will be display.
6.
Click the Close button to go back to the Plug-in Manager
dialog.
1.
To execute the plug-in, click Tools->Plug-in->Execute… on
the menu bar.
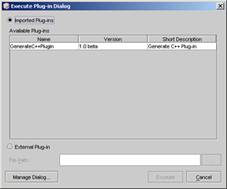
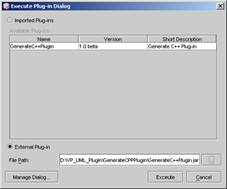
A dialog listing all
the imported plug-ins will appear. You can select the imported plug-in to
execute or specify another external Plug-in to execute.
Execute an imported plug-in
1.
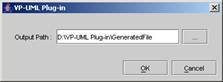
To execute the imported plug-in, select the plug-in that you want to
execute from the list and click the Execute button. Another dialog
appears, input or choose the output path and click OK button.
Execute an external plug-in
1.
To execute an external plug-in, click the External Plug-in radio
button, input the location and filename of the plug-in and click the Execute
button. You will be asked to specify an output directory.
Viewing in the Plug-in Details Dialog
1.
To view the details of the plug-in, select the plug-in from the list.
Right-click the plug-in and select Open Details…. The Plug-in
Details Dialog appears.
Viewing in the Manage Dialog
To view the details
of the plug-in, click the Manage Dialog… button. The Plug-in
Manage Dialog appears and all the imported plug-ins are listed. Select the
plug-in, the description of the plug-in will be displayed in the Description
area. Click the Details button to view the detailed information.
To start the VP-UML Plug-in Packer, click the Start Menu
button. Select All Programs -> Visual Paradigm -> Tools -> VP-UML
Plug-in Packer.

The following table describes the Plug-in Packer fields.
|
Field
|
Description
|
|
Plug-in
ID
|
The ID
of the plug-in. The plug-in ID is unique identity for the plug-in. You can
set the plug-in ID by yourself or let the application generate an ID for your
plug-in. The application will generate an ID if this field is blank before
saving the plug-in.
|
|
Name
|
The
name of the plug-in. This value can be duplicated in other plug-ins.
|
|
Author
|
The
author of this plug-in.
|
|
Version
|
The
version of the current plug-in. This field is stored as a string so that you
can. As that it can fulfill any style of version representation.
|
|
Included
Files
|
The
list of included files of this plug-in. The subclass of VPUMLPlugin must be
included in this list. The “Add” button is used to add new files
or directories. The “Remove” button is used to remove the
selected items.
|
|
Plug-in
Class
|
This
field stores the subclass of VPUMLPlugin. VP-UML will invoke this class to
execute your plug-in. The button that is next the text field is used to
search VPUMLPlugin classes from the included files and directories. If there
are more than one subclasses of the VPUMLPlugin in the included path, a
dialog will be popup to select a VPUMLPlugin class for this plug-in package.
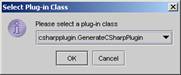
If
there is only one VPUMLPlugin found, the class name will place to the Plug-in
Class field automatically.
|
|
Icon
|
The
icon to represent this plug-in. The icon must be in 18x18 pixels The
supported image format are *.jpg, *.png, and *.gif. The selected valid image
will be added into the included files automatically. If you have not
specifies the icon, the VP-UML will use the default plug-in icon.
|
|
Short
Description
|
A
short description of the plug-in. This description will be used as tool tip
of the plug-in.
|
|
Description
|
You
can put a more descriptive explanation of the plug-in in this field.
|
Table 9‑1 Description of
Plug-in Packer
After filling in all the fields, select File from
the menu bar and choose Pack. A dialog will be displayed for the output
jar file destination and filename.
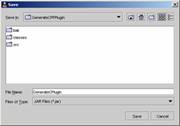
Select the destination and filename for the jar file and
click the Save button.
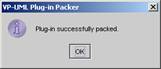
A dialog showing that the plug-in was packed successfully.
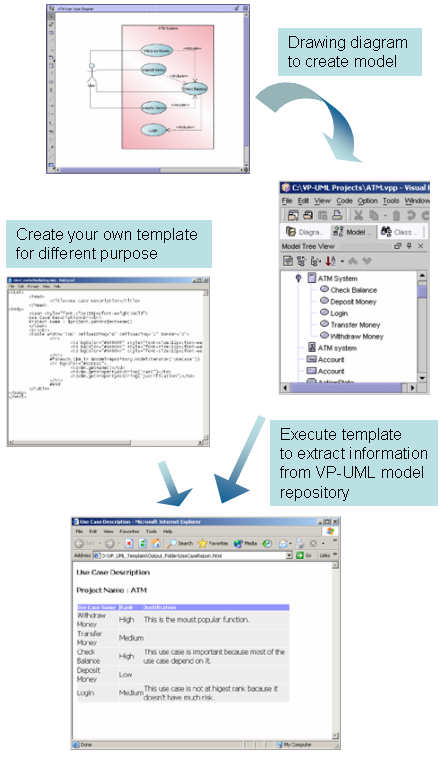
Before introducing how to import and execute templates,
let's glance at an example template called UseCaseDescriptionTemplate.jar.
The aim of this template is to generate a use case Scheduling report. For this
example, we are using the ATM.vpp project which is a sample bundled with
VP-UML. The ATM.vpp project contains one Use Case diagram and contains five use
cases. The UseCaseDescriptionTemplate.jar template obtains the use cases from
the VP-UML repository, extracts the information from the use case model, then
generates a text file in HTML format. The procedure is as the following
diagram.
There are two files inside the
UseCaseSchedulingTemplate.jar file - UseCaseScheduling.vm and TemplateProperties.xml
whichi is under the meta-inf directory. The file which generates the
report is UseCaseScheduling.vm. The following table describes the code
syntax of the template and the TemplateProperties.xml which is a
property file created by the Template Packer. The Template Packer
will be discussed later.
Item number
|
Description
|
|
1
|
Multi
line comment section
|
|
2
|
Static
body in HTML format
|
|
3
|
$project a provided variable which represent the
VP-UML project
getProjectName() one
of the method of the $project object which is use to get the project name
|
|
4
|
#foreach
#end A for each looping
|
|
5
|
$modelrepository a provided variable which
represent the VP-UML model repository
modelIterator() one of the method of the
$modelrepository object which is use to get the iterator of the model element
in the repository. If parameter is given then the specify model element
iterator is return.
|
|
6
|
$m a user define variable for temporary store
the model element from the for each looping
getName() one of the method of model element
which will return the name of the model element
getPropertyAsString()
one of the method of model element which is use to get String property, a
parameter must given
|
Table 9‑1 Description of the UseCaseScheduling.vm
template
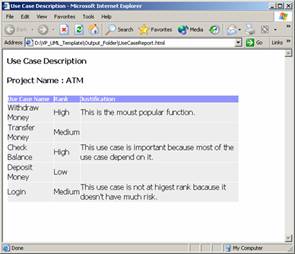
The output after executing UseCaseScheduling.vm.
The UseCaseSchedulingTemplate.jar template and a
tutorial of how to create your own template can be downloaded at www.visual-paradigm.com.
1.
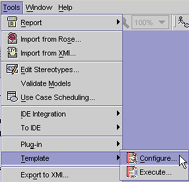
Click Tools -> Template -> Configure from the
menu bar.
The Template
Manage Dialog appears.
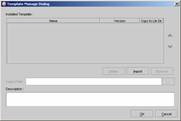
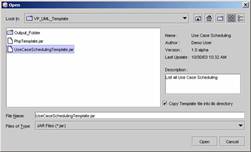
Click on the Import
button. The file selection dialog appears, select the template jar file. Once
the file is selected, the information about the template will be displayed on
the right-hand side of the dialog. Click the Open button to import the
selected template.
The imported template
will be listed in the Template Manage Dialog. Select the template from
the table. The description of the template will be displayed in the description
area and the Output Path text field will be enabled. Input the path and
filename for the template. To remove the template, select the template and
click the Remove button.
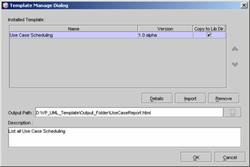
Inputting the output path and filename for the
template is optional. If the output path and filename have not been inputted,
the default path will be used (the directory where the template was executed
from).
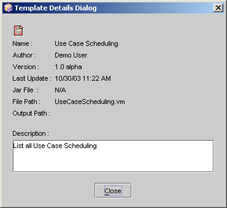
To view the details
of the template, click the Details button.
Click the Close
button to close the dialog and to go back to the Template Manage Dialog.
Click OK to close the dialog and the plug-in is ready to be executed.
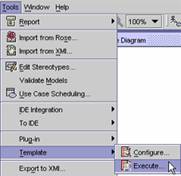
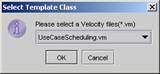
1.
To execute the template, click Tools -> Template ->
Execute… on the menu bar.
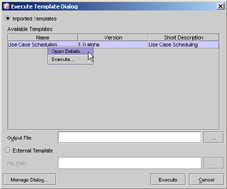
An Execute
Template Dialog will appear and all the imported templates will be listed.
Select the template and the Output path and filename will be display. Click Execute
button to execute.
Apart from executing
the imported template, you can also execute a template directly. To execute an
external template, click the radio button of the External Template.
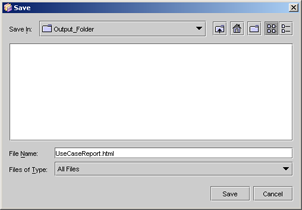
Input the path of the template then click the Execute button. A prompt
should ask for a destination; input a path and the filename and click Save.
Viewing the Plug-in Details
1.
To view the details of the template, select the template from the list. Right
click the template and select Open Details…. The Template
Details Dialog appears.
Viewing the Manage Dialog
1.
To view the details of the template in the Manage Dialog, click
the Manage Dialog… button. The imported template is listed and the
description will be displayed in the Description area. Select the
template, the description of the template will be show in the Description
area. Click the Details button to view the detailed information.
To start the VP-UML Template Packer, click the Start
button on the Windows menu bar. Select All Programs -> Visual
Paradigm -> Tools -> VP-UML Template Packer.
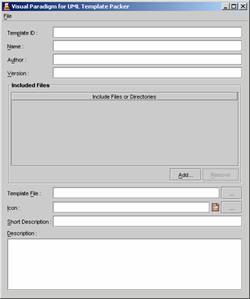
The following table describes the field of the template
packer.
|
Field
|
Description
|
|
Template
ID
|
The ID
of the template. The template ID is unique identity for the template. You can
set the template ID by yourself or let the application generate an ID for
your template. The application will generate an ID if this field is blank
before saving the template.
|
|
Name
|
The
name of the template. This value can be duplicated in other templates.
|
|
Author
|
The
author of this template.
|
|
Version
|
The
version of the current template. This field is stored as a string so that you
can. As that it can fulfill any style of version representation.
|
|
Included
Files
|
The
list of included files of this template. The “Add” button is used
to add new template file. The “Remove” button is used to remove
the selected items.
|
|
Template
|
This
field stores the template which would start execute first when the template
is execute. The button that is next to the text field is used to search
template from the included files and directories. If there is more than one
template in the list, a dialog will be popup to select for you to select the
template which template must execute first.
If
there is only one template is found, the template name will place to the
field automatically.
|
|
Icon
|
The
icon to represent this template. The icon must be in 18x18 pixels The
supported image format are *.jpg, *.png, and *.gif. The selected valid image
will be added into the included files automatically. If you have not
specifies the icon, the VP-UML will use the default template icon.
|
|
Short
Description
|
A
short description of the template. This description will be used as tool tip
of the template.
|
|
Description
|
You
can put a more descriptive explanation of the template in this field.
|
Table 9‑2 Description of
template Packer
After filling in all the fields, select File from
the menu bar and choose Pack. A dialog will be display for the output
jar file destination and file name.
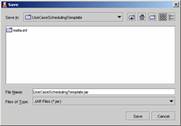
Select the destination and filename for the jar file and
click the Save button.
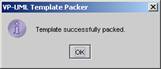
A dialog showing that the template was packed successfully.